How Screenshot Tests Elevate our Android Testing Strategy
I joined GetYourGuide as a Senior Mobile Engineer in August 2021 and am based in the company’s Zurich office.

Senior Andriod Engineer

Key takeaways:
Senior Mobile Engineer Benedict Pregler is currently working on the testing strategy for our Android app. A fundamental part of our testing strategies are screenshot tests. He shares an overview of what they are and how we use them at GetYourGuide.
I joined GetYourGuide as a Senior Mobile Engineer in August 2021 and am based in the company’s Zurich office. My team’s main area of responsibility is the Checkout domain. We must not only provide a smooth checkout experience for the user, we also need to make sure the checkout is working all the time. For this reason, I regularly look into our Android testing strategy to identify where we have weak spots, and determine how we can fix them.
One of our newly added testing types are screenshot tests. Here’s why we added them, what they are, and how we combined them into our codebase.
{{divider}}
The Challenge
We all know that according to the famous testing pyramid we should write many unit tests, some integration tests, and a few UI tests. The result is pretty good testing coverage across our app. But aren't we missing something?
Have you ever created a ViewItem for a RecyclerView with a dozen different states, and the preview of your XML file isn’t really helpful? Is your designer using Figma to create a design that you should implement but there’s no way to validate the actual implementation? And when you update a library – for example the material design library from Google – how do you make sure the design of the app is still correct?
The testing pyramid isn’t helping you with these kinds of questions, and manual testing of all the different ViewItem states is tedious work. It’s also often the case that you break a view state while fixing another one. Additionally, UI tests are not made for validating design aspects like padding or font size.
To solve this problem, GetYourGuide’s Android engineers rely on screenshot testing. With screenshot testing, we can easily verify all the different states a ViewItem has, check there is no regression, and designers can review our work.
What is Screenshot Testing?
For screenshot testing, you take one user interface component, which can either be a small UI element like a button, a ViewHolder from a RecyclerList, or even a whole screen from a fragment. This UI component will be rendered with static data and a screenshot will be taken in isolation. As a result, we have one screenshot only of this element in a specific state.
After writing a screenshot test, the screenshot images will be generated and included in the Git commit where the written screenshot tests are also committed. The screenshot images are now called the ‘golden masters.’
To validate that nothing has changed and your UI still looks the same as when you generated the golden master, the continuous integration system will run the screenshot tests, generate the screenshot images from the tests in memory, and compare them to the committed golden masters. When the images are the same, the test will pass and your CI build will succeed. If there is something different in the image, the build will fail. In the error message, the CI will return the screenshot test method which failed.
Screenshot Testing Libraries
For writing unit tests we are using the JUnit library. For integration tests we have Robolectric. For UI tests we can use Espresso. But what can we use for screenshot testing? There are several libraries available, the most popular being facebook/screenshot-tests-for-android, pedrovgs/Shot and cashapp/paparazzi, but of course, there are more out there. When looking at these libraries, we need to differentiate between two distinct types: those that use an emulator and those that don't.
Using the emulator can work, but it also comes with some problems. The biggest problem is the same that we have with integration and UI tests: speed. When we write and execute tests we want to run them as fast as possible so we can move on.
The second problem is the different text rendering and color representation between an emulator using the x86 architecture and the emulator using the ARM architecture. For us, this was the biggest blocker because all our Android devs are using an Apple M1 machine while our CI is a normal Linux machine using the x86 architecture.
To solve this problem we could increase the tolerance between the golden master and the image the CI generates, but that would just fix the symptoms and not the underlying problem. It would also hinder us from creating pixel-perfect layouts, and validating that they stay that way.
Another organizational challenge of an emulator-based approach would be that every developer and the CI would need to use the same emulator config (screen size, screen density, Android version, etc.) and make sure this was always the case. Otherwise, the screenshot tests would fail on one developer machine and succeed on another.
Paparazzi
The screenshot test library we are using is Paparazzi so we can ditch the whole emulator topic and all the problems that the solution would bring. Instead, the tests are fast to execute, cheap to verify on the CI, and easy to set up.
Under the hood, Paparazzi is using the layout library from Android Studio which also renders the preview for your XMLs. But instead of rendering the XML inside Android Studio, Paparazzi generates a PNG out of it.
Writing a Test
Writing a screenshot test is as easy as writing a normal unit test. We only need to follow three steps:

- Inflate the correct layout with Paparazzi
- Set the state to the view we want to test
- Do the screenshot
That’s it. When executing the tests, Paparazzi will save the generated PNG in the YOUR_MODULE/src/test/snapshots folder where we can easily verify if the screenshot we just created is correct and if we accurately implemented the design specs.
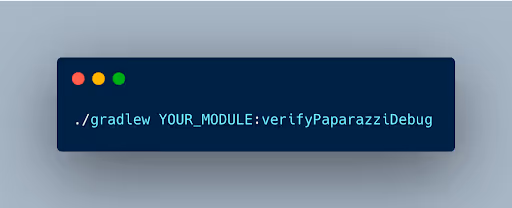
To generate the golden master images, we need to call Paparazzi with the record command like this:

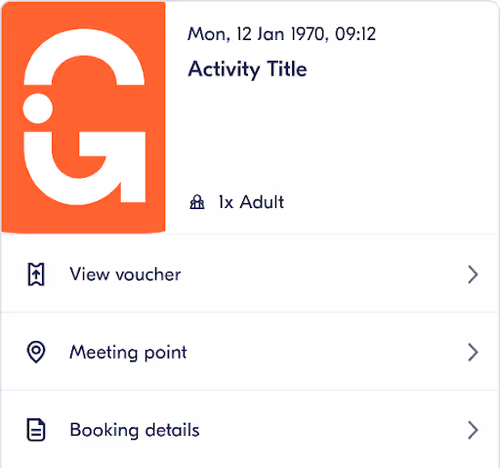
In the above example, we are testing the BookingTeaser which we are using inside a list so the user can quickly navigate to the desired booking:

When we want to verify the screenshots on the CI we only need to tell Paparazzi to run in the verify mode. In this mode, Paparazzi compares the in-memory generated screenshots with the golden master.
When Paparazzi detects that the screenshots are not matching, the test run will fail and will also output a file where we can easily detect what is wrong:
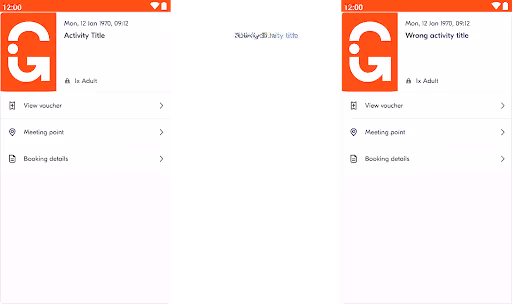
On the left side is the golden master; on the right side is what Paparazzi just generated in memory; and in the middle, Paparazzi shows us what and where the difference is. With this output, it’s quite easy to see what changed without checking every pixel.
Test Different Device Configurations
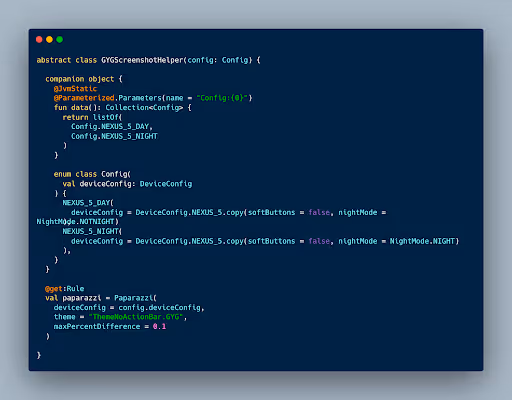
Now that we have the power to test different UI states, we can generate multiple screenshots from one test under different device configurations. We don’t just want to validate the design for different screen sizes, but also if it renders correctly in day and night modes.
To leverage this, we use parameterized tests. Currently, we use two different device configs – one for night mode and one for day mode. We could easily add more devices and every test would create additional screenshots for these device types.
Issues
Unfortunately, there are also some issues with Paparazzi. The biggest issue when adding Paparazzi is the conflict with existing unit tests. When we want to execute the unit tests, we don’t want to execute the screenshot tests and vice versa. Therefore we needed to add a flag to exclude running the screenshot tests while running the unit tests. We also needed to put all screenshot tests into one package.


With this setup, we are able to run the unit tests like normal. If we want to run the screenshot tests we need to add the following argument to the record or verify Paparazzi command:

First, we specify the folder where the tests are. With this argument, we could also target a specific class, and with the second argument we provide the screenshot property so the tests inside the screenshots package are not excluded.
But there are also some problems out there:
- Our buttons are not rendered properly which means they are not visible at all for the day mode theme and barely visible when we use night mode. It’s on our to-do list to investigate this problem more deeply.
- Constraint layouts are always using match_parent for the horizontal height and therefore expanding to the whole height of the screen size. We created a PR to fix this issue but we are still waiting for feedback.
- The screenshot test result is always rendered on a whole device screen even when the layout is just a one-liner TextView. Currently, we are using a self-made fork with the PR mentioned above to avoid this issue.
Despite these problems, we are still quite happy using Paparazzi. Although not a 100% perfect solution, it nevertheless solves a majority of our issues.
Conclusion
For GetYourGuide, screenshot tests are now as important as unit tests and solidly anchored in our Android testing strategy. We now have designers doing PR reviews, and whenever we write new features, we always include screenshot tests to provide the designers with a handy way of reviewing our work. It’s also easier to see what UI our colleagues created and therefore easier to review their PRs.
Also, our development speed increased because we can now create the UI without the need for a backend or even running the app. Sometimes the UI is done without once starting the app, or while the backend is still developing the needed endpoints.
I highly recommend incorporating screenshot testing into your Android strategy and operations. And while Paparazzi continues to present some minor challenges to the team, the benefits definitely outweigh the hurdles.

More articles like this